Showing posts with label Crafts. Show all posts

Friday, September 30, 2011

Free LDS Printables...

Dear Sisters,

I don't know how many, if any, of you have discovered Pinterest, the online pinboard site. I am in love with it. The internet is so full of fabulous photos, inspiration, tutorials and insights, it can quickly become daunting to find the things that really speak to you. Enter Pinterest. You sign up (for free) and create your own virtual bulletin boards. You can see anyone else's bulletin boards as well. It's a great way to keep track of your favorite things online and see the great things others found.

On Pinterest last night, I came across a blog that has great free LDS-themed printables. You can print them yourself or send them through Chari's company, Persnickety Prints, to be printed. The blog is called Proclamation Pictures.

Here's one of the freebies offered:

Enjoy!

Love, Kate

Monday, April 5, 2010

Tutorial Review: Finished Bunnies and Their Wardrobe

Dear Amy,

Happy Easter (just one day late…)! I hope you had a wonderful weekend and a peaceful and joy-filled Easter holiday. We had a very nice weekend packed with a trip to the zoo, a drive through the countryside and spending some much-needed time outside. The weather is warming up here and I could not be more thrilled. BRING IT ON!

I finished the bunnies for the boys Easter baskets. You can find the free pattern online here. I made a couple of changes to the pattern, namely I added elbows and knees and a changed the feet.

bunny eric

The elbows and knees were easy. Simply stop mid-limb while stuffing and sew across the limb and then continue to stuff. I changed the feet to a more gradual slope from the leg to the ankle to the foot to make the bunnies easier to dress. I felt like the foot shooting out at a 90-degree angle made it hard to get the pants on.

The boys are so into dressing and undressing their dolls now (focus on the undressing), so I made some clothes to go along with them. Yes, I realize that the clothes do not “match” in any sense of the word. But I was using up fabric scraps and they are really cute! I think I’ll add more clothes as time allows. They sew up so quickly! Here’s the link to the free pattern and tutorial for the pants and shirt.

bunny eric dressed

The bunnies are gender neutral, so they also got a dress (worn with pants in the photo for a more funky vibe). You can find the dress pattern and tutorial here. D helped with the styling for the photo.

bunny d dress 

As you can see, this bunny has unfinished ears. I love the fuzzy look it gives. I lieu of the tied pants as shown in the pattern, I added an elastic waist using 1/4” elastic. So easy! Yes, the bunny does need to lose some weight around the middle so that the pants fit better!

bunny D dressed pants

It took all of D’s self control not to grab the bunnies as I was trying to take photos. As he prefers all dolls without clothes in our house (the easier to change their “poop” as he says), he couldn’t handle seeing the bunnies lying there fully dressed. Needless to say, the bunnies are now properly naked and well cared for.

Happy Easter a day late!

Love, Kate

p.s. The food revolution starts tomorrow! EEEEEKK!

Thursday, April 1, 2010

Tutorial Review: Toddler Sleeping Bag

Dear Amy,

Happy April! It’s getting warmer here,but not quite warm enough. So, we spent Tuesday night at a nearby resort with a huge indoor water park…a little spring break vacation to get us ready for upcoming summer trips. We only stayed one  night, but we had a wonderful time. The boys loved it. The water park was a huge hit. Eric, age 1, was fearless and his 2-year-old brother, D, was much less so.

This was a bit of a test run for our big road trip to Utah this summer. I’m so excited! Last year, we were somewhat nervous to make the drive as brand new parents with an infant and a one-year-old. But the sheer volume of necessary baby gear was far more overwhelming than the actual drive. We had such a fun time! I’m looking forward to the trip this summer even more. The boys are a little older now and I can only imagine that travel with a two-year-old and a very alert one-year-old will be much more…um…exciting.

I’ve started to get a few things ready for our road trip. I’m nothing if not a super planner. I found a great tutorial for a toddler sleeping bag on Ruffles and Stuff. I got the basic idea from Disney on her blog, but I tweaked the concept quite a bit.

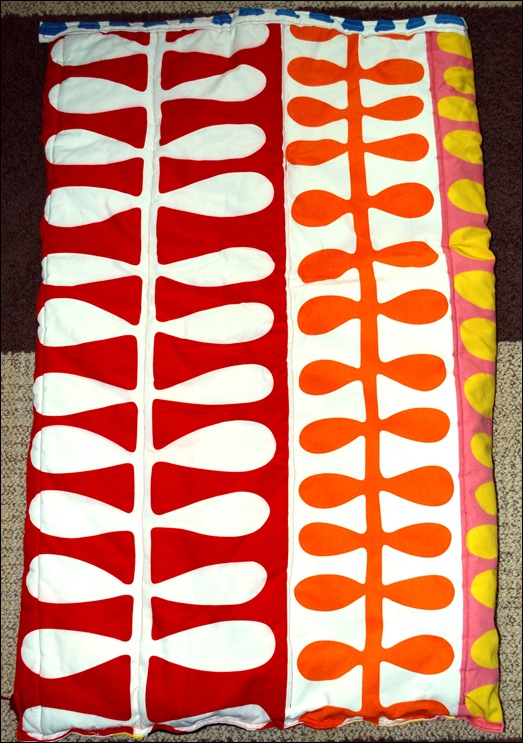
I used a shower curtain from IKEA for the exterior fabric and a soft flannel I already had for the interior. I used four layers of batting as she suggested. I measured D and determined finished dimensions of 50” wide (when laid flat) and 39” long for the sleeping bag. I wanted it to be big enough for him to move around, but not big enough for him to get lost in.

D sleeping bag 2

As you can see, I did use a zipper. I found a 34” parka zipper at Joann’s on sale for $1.49. Joann’s has an awesome variety of zippers. They even have 100” sleeping bag zippers. I had never seen those before. You could easily use one of those to go down the side and around the bottom and simply cut it and sew across it a few times as a stopper. I went with the parka zipper and used it down one side. I sewed the bottom shut.
D sleeping bag

I left about five inches from the top of the zipper and the top of the sleeping bag so that I could easily pull it back and so that he would have more air when he buries his head. He tends to snuggle down when he sleeps. So sweet.

Anyway, I basically finished the top with a binding, like you would for a quilt, but I machine-sewed it. After a washing, the sleeping bag really fluffed up.

Our overnighter at the resort was a good test drive for D and his new sleeping bag. He was so excited to try it out. He slept soundly and long. I’m ecstatic. Not having to lug two portable cribs into every hotel seemed a distant dream…

NO. LONGER.

Yeah! Eric’s is almost finished. He’s much more mobile and quite a bit sassier than D. I’m not sure a sleeping bag will work for him. He may not stay put. But, it is almost finished and we’ll give it a test run here at home. Wish me luck!

What do you think, Internet…where do your toddlers sleep on road trips?

Love, Kate

Tuesday, March 30, 2010

Tutorial: Easter Basket Grass


Kate,
I wanted to share one of the things I love doing for Easter. It's fast, east and always turns out! It's a fun one to have little hands help with. If you start now, you'll have a great Easter centerpiece just in time. Here's what you do.


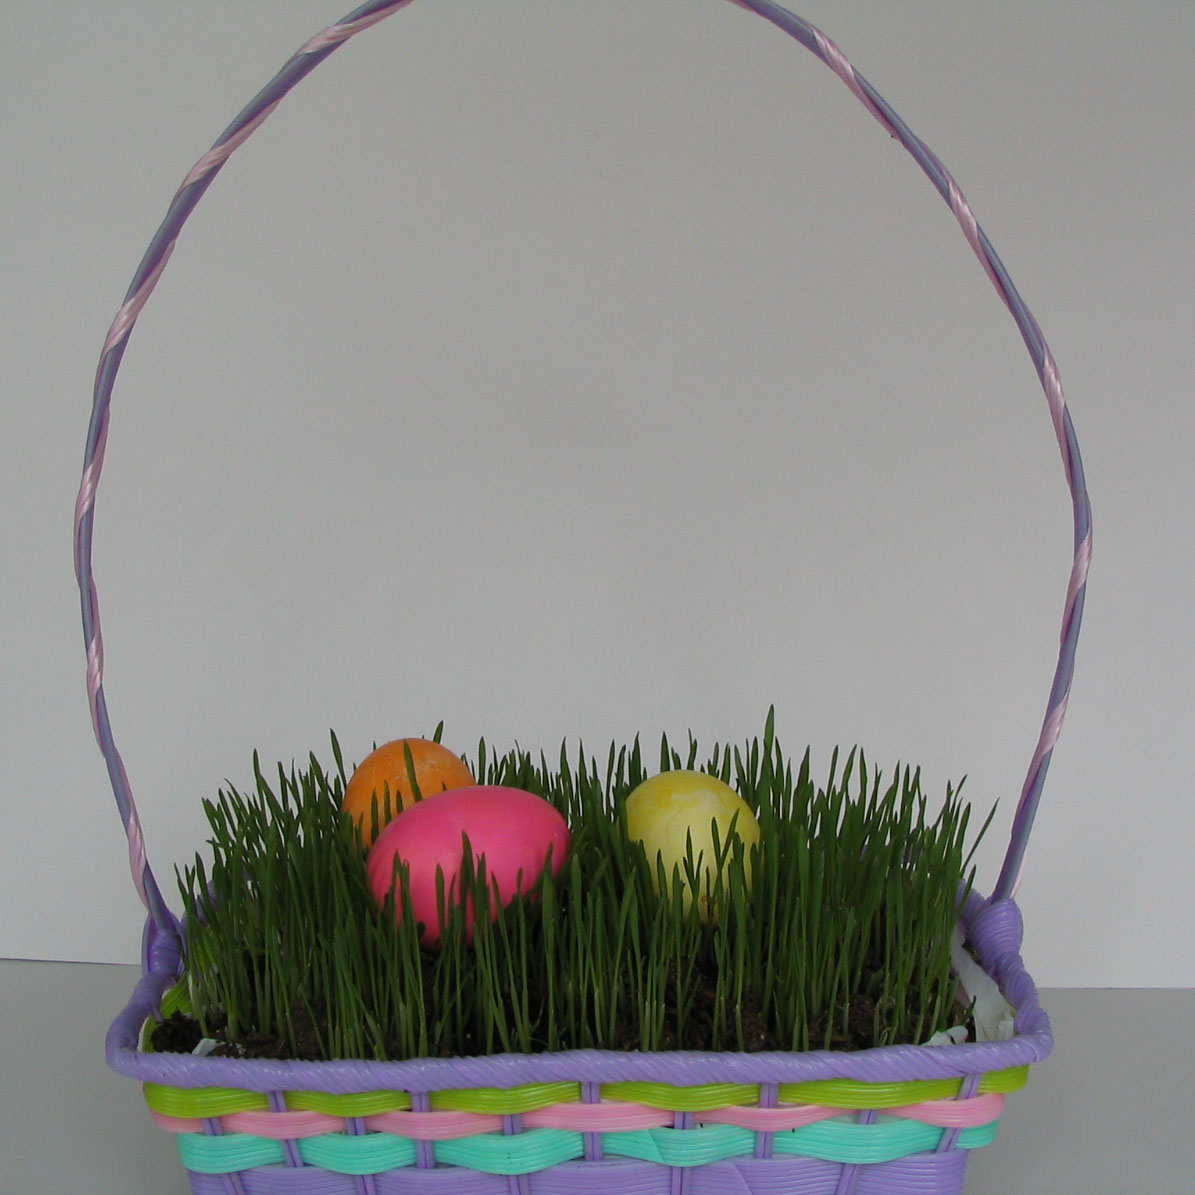
Line an Easter basket with plastic. I used a plastic basket as well so that if I do have a little dirt on it that I want to rinse off when Easter is over, I'll have that option. I used a couple of plastic grocery bags to line it with. Fill that with dirt, make sure you don't get to much...the grass grew really well, so I wouldn't fill it to the top.
Next I added wheat...yes that's right, plain old wheat. I just used the wheat that I grind for whole wheat flour. If you don't have whole wheat kernels, you can get them in bulk at a health food store or other stores. I then added a thin layer of dirt over the top, watered it, and put it in front of the window. It took 4 days to see good growth, but these photos are taken on day 5. I hope you'll try it and let me know how it works. I think it is so fun this time of year to have the real grass in the basket. We blew out some eggs and the kids colored them to add to the basket.


Enjoy and Happy Easter!
Amy

This post it linked at A soft place to land
We are participating today on Get your craft on!

Friday, March 26, 2010

Tutorial: Happy Easter String Eggs


Kate,
I decided that we needed to make some fun Easter decorations. N. wanted to help. I remembered the string eggs from years ago and decided we'd make some. After a little research I decided that we'd bag the sugar-water approach and use thinned glue. It was a fun project and N. liked the outcome, but he said it was too hard for a 3 year old. I think it would work better with the older kids. Here's what we did.

You will need:
glue (I used Elmer's school glue)
paper plate
crochet yarn
small balloons blown up


Thin glue with a bit of water. I did this on a paper plate. After trying several things, I found that rolling the balloon in the glue mixture prior to wrapping with string worked best. This was the part N. really enjoyed. He was the balloon roller!


Wrap with string. Make sure you don't have any large spaces. Try to end with the string in an unnoticeable location.

Roll balloon in glue mixture again, making sure it is covered, but not to heavily. We did sprinkle some with glitter at this point, but I think I prefer the plain eggs.

Hang to dry. Make sure you hang them where they can drip without ruining something. I hung them outside overnight and by morning, the eggs were hardened and the balloons were shriveled up and easy to remove with tweezers.


I wish we would have done some in yellow, but they were out of yellow crochet thread at the fabric store. I may make some more with the older kids. It was a fun project. We hung some from the rod in our living room as you can see. We also tried some in a basket. I have seen some bigger string eggs that then have an opening cut in the front and are filled with Easter grass and some small bunnies or something in them. So many possibilities! Let me know how you would display them.
Have a great day!
Amy

Wednesday, March 24, 2010

Pattern Review: Super Cute Bunny for the Kiddies

Dear Amy,

Good morning! So, this is our first Easter with the boys. I’m so excited. Remember how much fun we used to have as kids searching for our baskets? We couldn’t look for eggs until we’d found our basket. Mom and Dad always included such fun things in our baskets.

In sticking with our determination not to BUY, BUY, BUY, I’ve been pondering different things to include in the boys’ Easter baskets. The Internet is full of free patterns for those who know how to find them. One of my favorite sites for free sewing and knitting patterns and tips is Purl Bee, the blog for the store Purl Soho in New York. I. LOVE. THEM.

I’m making the Purl Rabbit for each of the boys for Easter this year. The lovely folks at Purl Soho also included free patterns for clothes for said rabbits. There’s also a dress pattern for Ms. Rabbit. So sweet!

rabbit

I used a lightweight quilting cotton I had on hand for the body. It’s a pale green with white dots. Love it! I used a [plain brown embroidery thread, three strand, for the face.

rabbit face

If you look closely, you can still see the pale markings of the pencil I used to outline the face before I stitched it. I used a curved needle, which I would HIGHLY recommend when sewing faces on stuffed animals and dolls. It makes it so much easier.

rabbit knees

I made two changes to the pattern. First, I sewed the ears on prior to sewing the body front and back together, instead of hand sewing them on after stuffing the body. Two, I added a line of stitching for knees in each leg. This makes the rabbit sit better. On my second rabbit, I think I’ll add elbows, too.

LOVED making this adorable woodland creature. It took about an hour and a half from start to finish…not bad at all. The boys are at ages where they love to dress and undress things, so the clothes are next on my list.

Have a great day! We’re headed out to enjoy the sunshine!

Love, Kate

Monday, March 8, 2010

Tutorial: How to Alter & Use Stained Onesies

Dear Amy,
As you know, our two boys arrived very suddenly last spring. They were five months and 17 months old at the time…just babies.

When we made the decision to take the boys and commit to making it work, we were instantly thrown into a whirlwind of preparation. We didn’t have the usual nine months to prepare for their arrival…we had a few days.

D behind

We didn’t have a room set up. We didn’t have cribs or car seats or strollers or clothes or toys. We didn’t have anything. Fortunately, generous friends and family rallied to provide us with hand-me-downs from their children. We very quickly accumulated everything we needed to welcome our little ones.

Some of the clothing we received had been worn by more than one child already, and although still in good shape, some of the shirts were showing some staining. But I hated to get rid of things simply because of a little staining or discoloration. So I got creative.

 E baby behind

I looked around for some sort of solution for discolored onesies. Enter an ingenious little product I picked up at Hobby Lobby, my home away from home. For a few bucks a bottle, you can find tie-dye in little spray bottles. It comes in a handful of colors and is super easy to use.

This time, the basement worked fine for this project. Next time, I hope to do this type of project outside during warmer weather! I placed a large piece of cardboard down to protect the surface underneath. Then I spread out the onesies and started spraying. I combined orange and red on some and blue and turquoise on others. I focused on the part of the onesies that would be seen—mainly the neck and arms. Part of the fun of this project is not worrying about the color being uniform, just go crazy and spray with abandon!

red onesie

I sprayed several at once and then flipped them over and sprayed the back. Once they were finished, I placed an old towel on my drying rack and then placed the onesies on that to dry. Once air dry, I heat sealed the color in the dryer. The directions for the dye are on the packaging.

onesies stack
Such an easy solution and so inexpensive. This was a life-saver during the winter months as the boys could continue to wear their short-sleeved shirts all winter layered with a long-sleeved onesie.


Love,
Kate

Friday, January 22, 2010

Tutorial: Valentine Craft with the kids

Kate,
We decided it was time to make some decorations for Valentines...so,  N (age 3) and E (age 6) joined me in making hearts.  We decided that stained glass hearts would look great when the sun shines through our west windows!  Here's what we did...
You will need:
Wax paper
Pink, red and white crayons
potato peeler
scissors
an iron
a couple of old rags


I started with a couple of sheets of wax paper (about 18" long) and shaved some crayons with the potato peeler.  Obviously N needed help, but E was able to do it by herself.


When you have enough shavings, spread them around and place another piece of wax paper on top.  I did move it to the ironing board first,
re-spreading the shavings and then put the other wax paper on top. 


Now it's time to iron!  Place a cloth on top of your ironing board, because I found out the hard way that it does bleed through a bit.  Put another cloth on top and then iron with hot iron.  Move it slowly until the crayon shavings have melted.


Next, we cut out hearts and hung them in the window.  We just taped them to the window, but they would be cute hung with ribbons.  This photo didn't turn out great, but you get the idea!  They really do look fun as the light is shining through them.  Enjoy...I think the boys would have a great time helping you with these.

Have a great day!
                        Amy