
Monday, October 17, 2011
My First Canning Adventure!
I have never had a separate stand-alone freezer. It's a whole new world. I. Love. It. I have been spending a lot of time lately roasting tomatoes, making soups with fresh local produce, and making vegetable and chicken stock...all for the freezer. I'm thrilled with the concept of being able to use local-produce-based, homemade foods all winter. Plus, as silly as it may sound, I find it really satisfying to "put up" food and to see what I've accomplished from this fresh, local produce. I know where it came from and how it was made. I love that!
After listening to Amy's stories of preserving, I decided to try to dehydrate some hot peppers and make our own chili powder. The peppers from the farmer's market were gorgeous and cheap (remember them from my last post?) We also harvested quite a few from our small garden. So, while wearing gloves, I sliced them length-wise in half and removed the seeds. I then dehydrated them. When they were nice and dry, I put them in my beloved Vitamix blender and turned them into powder.
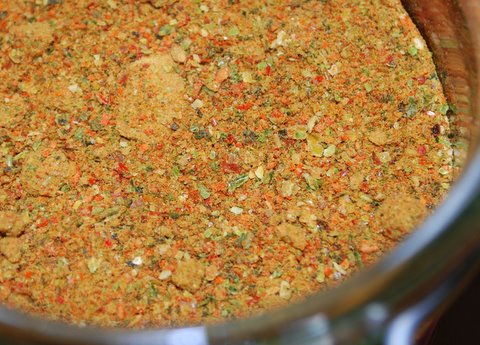
If you try it, just be careful not to inhale when you take the lid off of the blender. It's potent stuff! But it smells heavenly. We can't wait to make chili this winter with our roasted tomatoes and homemade chili powder! Thanks for the idea, Ames!
The boys are in love with dehydrated apples, so I'm making as many as I can. We purchased apples CHEAP from a local orchard. We actually got a really good variety, too.
I bought two dehydrators cheap at a local factory store. They've been running almost non-stop since I bought them a couple of weeks ago. But, in lieu of a dehydrator, an oven can also be used to dehydrate apples. First peel, core and slice your apples. As you slice them, place them in an antibrowning bath. You can make the bath by crushing and dissolving 6 500mg vitamin C tablets in 2 c. of cold water or by adding 1/4 c. lemon juice to 2 c. cold water. After 10 minutes in the bath, remove and pat the apple slices dry. If using the oven method, place the slices on a cake cooling rack and place the rack in a 170 degree oven for about 3-4 hours. If using a dehydrator, place the apple slices on the racks in the dehydrator, careful not to overlap. The time in the dehydrator depends on the type of dehydrator. The slices are done with they are leathery and won't stick together when squeezed together. Cool and then place them in a covered container for one week. If there is no moisture in the container after one week, transfer the slices to an air-tight container and store for up to one year. If moisture is present, try dehydrating longer.
So aside from dehydrating and freezing, I tried my hand at canning this weekend...for the first time! I was a little intimidated, but I read a lot before I got started and I hope I did it right. I have to wait a little longer before checking to see if my jars sealed correctly.
I used a variety of apples. I did core them, but I didn't remove the skins as that is where so many nutrients are found.
I didn't add any sugar at all, just lemon juice and cinnamon. It's delicious! I canned 8 quarts so far and made some to keep in the fridge, which Rit has almost finished off already.
I am loving all of this preserving and I look forward to another week of it. It's getting me even more excited for my big garden next year. YEAH!
Love, Kate
Tuesday, October 11, 2011
'Tis the Season!
I guess it's the part of Dad I have in me, but I long to jump in the car and go for a long drive to drink in the spectacular color. I love driving up to Door County, reveling in the color, and stopping in the small coastal towns for some yummy treats: fresh apple cider, pick-your-own apples, homemade caramels, delicious fire-roasted tomato salsa, baked goods.
I also love the farmer's market this time of year. Since we have never had a very big garden of our own (that will change next year...FINALLY!), we've relied on the farmer's market to supply most of our fresh produce. This fall, the farmer's market has been spectacular.
This was some of my take from our trip last weekend. I'm in a preserving frenzy right now, which is all very new to me. I'm loving it.
![]() |
| tomatillos for fresh salsa |
![]() |
| fresh organic garlic from a local farm |
![]() | |
| yummy hot peppers |
![]() |
| just a few of the five-gallon bucket's full of tomatoes |
![]() |
| Fresh apples from a local orchard |
Today's agenda: finish planting the plants I can't seem to stop buying and clean out the pots to ready the truck for a trip to the compost. Later this week: tomatillo salsa (thanks for the delish recipe, Ames!), roast peppers, can applesauce, dry apples using my new dehydrators, and get the carrots ready to freeze for use in smoothies. LOVE this time of year!
On a lighter note, I ordered a bunch of snow boots from an online company with free shipping and free returns. I have yet to own a good pair of snow boots during my time here in Wisconsin and it makes my winter experience less than wonderful. My toes get wet and go numb oh-so-quickly. So, my quest for the perfect snow boots has begun. Snow boots are large, right? I was stunned to see that this online company shipped ALL of the snowboots together in one GINORMOUS box. Like, coffin-size. I was on the phone with Dayna when it arrived. I genuinely believe that both she and I could fit comfortably together in said box. IT'S THAT BIG! I almost couldn't get it in the house by myself and I've got some muscles.
The photographic evidence:
![]() |
| whatever...the photo does not seem to want to be righted. Just tilt your head, okay? |
On the up side, amongst the many boots it contains, this box holds two very promising pairs of winter boots for moi. Now to whittle it down to one pair.
Now for the gratuitous cute picture of the boys. They love to dress up...every day. They love to put on random items of clothing and hats and blankets and aprons. Here's yesterday's get up:
![]() |
| Again, I can't get the photo to want to stand upright. |
Love, kate
Monday, September 26, 2011
Weekend Recap and the Coveted Recipe Revealed
I can't believe that you have already come and gone! I've been looking forward to your visit for over a year and now it's over. Hard to believe. We had such a good time and I'm so grateful that you were all able and willing to come. I truly loved spending the time together with you and Dave and mom and dad. Molly, we so missed you.
Here are a few photos of our memorable weekend:
![]() |
| The bike ride to the beach. |
![]() |
| Canoe Races |
![]() |
| Mom and Dad |
![]() |
| Paddlers Extraordinaire |
Roasted Red Pepper-Basil Pesto (compliments of Bobby Flay)
You can roast the red peppers as he does. Obviously, that's preferred. If you're typically short on time (like me), you can use the jarred variety.
- Roasted red peppers (the equivalent of two peppers worth)
- 2 cloves garlic
- 1/2 cup fresh basil leaves
- 3 tablespoons pine nuts
- 1/4 cup extra-virgin olive oil
- 1/4 cup grated parmesan
- Salt and freshly cracked black pepper
We have used this recipe for everything from pizza sauce to a dip for crackers and veggies to a sauce for sandwiches (as we did during your visit).
I can't wait to hear what you do with it. I'm excited to share with you next week the recipe I found for laundry detergent. I wanted to test it out before I shared. After using it for about three weeks, I really like it and haven't had any problems. So, next week it is.
I had such a great time with you all and thank you for the fun visit.
Love, Kate
p.s. LOVED the tomatillo salsa you made while you here, Ames. And Dave, LOVED the stuffed jalapeno poppers you made...even it it did take me hours to recover from the heat.
Wednesday, September 14, 2011
It's Tomatillo Time!
I'm so excited to share a new favorite at our home! We started growing tomatillos a few years ago in the garden. We only planted them the one year and they've faithfully returned each year since. I grew them at first so I could make the tomatillo salad dressing we all love. Then I started experimenting with other recipes, but haven't considered any of them "keepers". I've finally made a recipe we really like. Drum roll please...it's Roasted tomatillo salsa. We like it with chips or as a sauce for smothered burritos. I've decided that the trick is to have plenty of hot peppers in the mix. That is not the norm around our home...I think we have tender taste buds and don't like things very spicy, but the combination with the tomatillos is perfect! It's pretty easy to make and as usual at my house, you taste and add whatever the batch needs. The original recipe is found at Allrecipes here, but I've included the recipe with my modifications below.
1 pound tomatillos (with husks on)
1 onion quartered
4 garlic cloves peeled
4-5 banana or Anaheim peppers (I've even used a bell pepper with the others)
1-2 jalapeƱo or Serrano Chile Peppers (depending on the heat you want!)
Salt to taste
a handful of chopped cilantro
Rinse tomatillos with the husks on and wash the peppers. Put tomatillos, peppers, onions and garlic on a cookie sheet and roast on broil until they start to blacken. You may need to stir so they roast evenly. Cool and remove tomatillo husks and pepper stems (and seeds if you don't want it very hot!). Put tomatillos, peppers, onions, garlic and salt in food processor and blend until slightly chunky. Heat in sauce pan if desired to further blend the flavors (sometimes I skip this step and it's still great!). Add cilantro and serve with chips or over a burrito. Enjoy!
I do want to hear if you try this. I've made a couple larger batches and frozen it. I'll heat it and then add the cilantro. It will make a great winter meal. I wish you all lived closer so I could share the many tomatillos that currently grace my garden!
Tuesday, April 20, 2010
Another birthday and a Flip Flop birthday cake
Kate,
What fun things you are doing. I hope to have a little more time after this week. Last weekend was great and very full. We had a birthday party, delayed family Easter party, scout campout, wedding reception and birthday dinner, let alone the other basic items that happen to keep a family running.
I wanted to show you the cake I made for Em. She wanted another princess cake, but after doing that for the past two years, I looked for another idea. She is a flip flop girl, so when I found this cake idea, I knew it was it!
I hope it was a great day at the park!
Love,
Amy
Tuesday, April 13, 2010
Tutorial: Tank birthday cake
Kate,As you know, birthday season has started in our home. We are fairly consistent with birthdays from the end of March to the first of October. Fitting 8 birthday's in during that time is crazy, but fun. There are times when we don't even take down the crepe paper and balloons before the next celebration. I thought I'd share with you the cake I made for B. a couple of weeks ago. It is supposed to be a tank cake. Hopefully you can tell that! He loved it.
This is what I did...I mixed up a cake mix. (I know, not as good as from scratch, but that's all I could handle that day.) I poured the batter into a 9x13 pan and the rest in a greased and floured small metal bowl (make sure it can handle the heat of the oven). I baked them according to directions, baking the bowl cake longer. I have found that if you cut wax paper to fit your 9x13 pan and put it in the bottom before greasing and flouring it, the cake always comes out great.
After removing the cakes from the pans and letting them cool, I frosted them with B.'s frosting of choice, which is:
1 lg. pkg. pudding (chocolate in this case)
2 cups milk
1 8 oz. cool whip (or whipped cream...which is what I did this time)
Mix the pudding with milk and put in fridge until thick. Add cool whip or whipped cream. Let set a bit longer. Spread on cake. You do have to refrigerate the cake once frosted.
After frosting the cake I added chocolate sprinkles. One of my kids also rolled out a large tootsie roll for the tracks and we used small peanut butter cups on the inside of the track. The bowl cake was the turret and the cannon was part of another large tootsie roll. It was a lot of fun. Tuck this away for future reference. With two boys, I'm sure one year they will want an army themed birthday!
Enjoy your day!
Amy
Friday, April 2, 2010
My Personal Food Revolution
Dear Amy,
I’m disturbed. Let me clarify that statement…yes, I am disturbed in general (wink), but I am particularly disturbed about the eating trends of the general public. And although I’m vigilant about what we eat in my own house, I need to do better.
There’s a new show on TV called Jamie Oliver’s Food Revolution. I’ve seen Chef Jamie Oliver on the Food Network before. He’s entertaining to watch and makes everything look simple and fun…and he’s not big on exact measuring, which I love because I’m not either.
A couple of weeks ago, this new show aired. The premise of the show is this: Jamie goes to the most unhealthy city in America (based on government statistics, death rates, etc.), which happens to be a city in West Virginia, for a few months to start a food revolution. He wants to teach the public how to eat healthier. He wants to change the school lunch program to freshly made whole foods. He works with a family one on one. He offers cooking classes to the public. IT’S. RIVETING. You can watch the first two episodes online here.
In watching the first couple of episodes, I’m struck by how completely unhealthy most of us are and how resistant to change people are. On his first day in town, Jamie walks into a local elementary school and sees the kids eating breakfast…a breakfast of pizza—cheese-laden, pepperoni-topped pizza. FOR. BREAKFAST.
My kids are not yet school age, so I’m not super aware of what is now served as hot meals at school. We ate school lunch growing up, and it probably wasn’t the most healthy, but I don’t remember it being particularly unhealthy. I was shocked to see over the course of this episode what we feed our children at school. And when Jamie offered to prepare healthy, fresh meals, he was met with such resistance and so much red tape, it made me shudder.
I understand the need to keep costs down and to create a streamlined system for food preparation. A school is a business and needs to account for cost and follow certain guidelines. I understand all of that. It just seems that we are focusing on all the wrong things. That’s all I’ll say because I want you to watch the episodes online.
Remember that we spent some time at the big indoor water park this week? We weren’t allowed to take in any food or drink to gently encourage us to eat at the one snack bar in the park. We did eat lunch in the park and were forced to look to the snack bar for sustenance. Very disappointing. We had to choose between hotdogs, hamburgers and a variety of fried foods. We rarely eat out and even more rarely eat fast food…practically never, in fact. I don’t want that in my body or in the sweet bodies of my boys. I so wish that snack bar had some other options…perhaps some yogurt, fresh fruit, granola bars, maybe some wraps. This snack bar, like any other, is a business. And their bottom line is making money. It would seem that if the demand were there for healthier options, they would be provided. I vow to make my desire for healthier food known the next time I’m there.
Starting next Tuesday, our family food revolution begins. We do eat relatively healthy. I’m vowing to do better. Starting on Tuesday, we are going sugar and caffeine free.OUCH! Let me repeat that. OUCH! I. LOVE. SUGAR. I. LOVE. CAFFEINE. This will be extremely difficult to say the least. I know my body is dependent on these substances and I don’t want that anymore. I want to be free of unhealthy dependencies. This will most likely kill me. DEAD. I have already warned everyone I know that I will be a completely different beast next week and to please steer clear for their own safety. Headaches and a full-body rebellion are expected.
We are also going to eat more whole foods and fewer processed foods. I would like to go processed-food free, but I need to look more closely at the logistics of that before I commit.
In watching Jamie Oliver’s show, I was struck by how most elementary school kids could not identify basic fruits and veggies. I want my kids to be very hands-on in our garden this summer and every summer. I want it to be an integral part of their lives. I want them to know where food comes from, how it grows, how to harvest it, how to preserve it and how to prepare it. They are sponges and now is the time to instill good values and habits.
I’m stepping down now. I have been thinking about this a lot lately and I feel super strongly about it. Wish us luck. I am so going to need it.
So, peeps, anyone want to create their own food revolution?
Have a great weekend!
Love, Kate
Wednesday, March 31, 2010
April Fools Day Dinner

Dear Kate,
With April Fools Day being only a couple of days away, I thought I'd share a tradition we have. Our kids love the dinner we typically have that night. It's nothing special... usually just spaghetti, salad, bread sticks and dessert. The different part is how it's served. I rename all of the menu items and also rename all of the utensils (we include very unusual ones). The children fill out their menus and then I serve them. Here is an example of the menu. The items in parenthesis are not included on their menu!
You are going on an adventure. You will come across some of the things listed during your dining activity.
Please put numbers 1-4 next to the items below.
Slimey Snakes (that would be the spaghetti)
Frog Bones (bread sticks)
Seaweed and moss (salad)
Mud (chocolate pudding)
Quick sand (milk)
Next pick four different items that you would like to take with you. Place numbers 1-4 next to them.
Shovel (ice cream scoop)
Screwdriver (butter knife)
Ax (pancake turner)
Rope (straw)
Arrow (Spatula)
Magic Wand (spoon)
Pitchfork (fork)
They are then served their number 1 item from the top of the list with their number 1 item at the bottom of the list to eat it with. They usually all have something different. Some start with dessert while others start with salad. They get their number two picks after they are done with number one. It is so fun to hear them and to see how creatively they eat with what they have. You'll have to try it as the boys get older. Even N. loved it last year and he was only two, but he did have his older siblings to watch. Wait a couple of years and let me know what you think!
Love,
Amy
Tuesday, March 23, 2010
Fresh Lime Juice

Dear Kate,
I've decided to share with you one of the ways I live on a little less. As you know I really enjoy cooking and have found that I like to use my freezer when it comes to saving money. I found limes last week for 12 cents each...what a bargain. I bought 8...should have bought more. Tonight I am juicing them with my little antique hand juicer and then freezing the juice in ice cube trays. After it's frozen I put it in a freezer bag marked and dated. Then whenever I need fresh lime juice for a recipe, I have what I need. It's so convenient and much better than the bottles of juice. I have loved it, especially in fresh salsa in the summer. Each cube is about 2 Tablespoons. I also do this with lemons and with the leftover pineapple juice from canned pineapple. I love the pineapple juice in my green smoothies. You'll have to try it and let me know what you think.
Have a great day in the cold state of Wisconsin. We are experiencing weather in the high 50's...it's been great!
Love,
Amy
Friday, March 19, 2010
Recipe: Green Smoothie Deliciousness
Good morning! We both know how hard it can be to get enough veggies into our kids’ diets. i know that you’ve been interested in green smoothies for awhile now, so I thought I’d share one of our favorite green smoothie recipes.
We have this practically every day for lunch. The boys love it and anticipate it. And it’s super fast and super easy. Of course, the recipe is not exact since I made it up and I make variations of it depending on what I have on hand.
Combine:
A couple of large spoonfuls of vanilla yogurt
A couple of large spoonfuls of unsweetened applesauce
one banana
a few cubes of cooked sweet potato (skin-free)
a handful of raw spinach
1/2 cup or so of apple juice
Blend until smooth.
These amounts are for an amount that feeds both of my boys—maybe a couple of cups or so. I’ve added nuts, wheat germ, and raw oatmeal in the past—all have worked well. To blend it, I use my favorite kitchen toy—the Magic Bullet. I LOVE this thing! I got it on super sale at Kohl’s and I use it at least once a day…typically several times a day.
I usually pair a green smoothie with crackers, humus, sliced veggies, raisins and some cheese. The boys love it and I love knowing that they are eating well.
Give it a try! Have a great day!
Love, Kate
Saturday, March 13, 2010
Recipe: Scones...the New Breakfast of Champions
Dear Amy,
So, my BFF Tina came over this morning to spend some time with the boys, join us for breakfast and cut our hair—even the boys’. She has a salon here in town, but she’s kind enough to come over to cut our hair here at home. So sweet!
You know how much I love to cook, so I tried out some new recipes for breakfast this morning. I’ve made scones before, but never breakfast scones. I found a recipe and tweaked it a little. We loved the outcome. Give it a try!
SCONES (made 12 smaller scones)
1 3/4 cups all-purpose flour
4 teaspoons baking powder
1/4 cup white sugar
1/8 teaspoon salt
5 Tablespoons unsalted butter (Make your own! Find the directions in a previous post
1/2 cup milk
1/4 cup sour cream
1 egg
1 Tablespoon milk
Preheat oven to 400 degrees. In a large bowl, combine flour, baking powder, sugar and salt. Mix well. Cut in butter using a pastry blender until you have pea-sized lumps. In a separate bowl, mix together milk and sour cream. Add milk/sour cream mixture to dry ingredients. Stir gently until well blended. The key to good scones is in working the dough as little as possible. DO NOT OVER STIR!
With floured hands, form the dough into balls. Place on a greased baking sheet, lightly touching each other and gently flatten slightly. In a small bowl, combine egg and remaining milk. Whisk together. Brush the tops of the scones with the egg wash and let them sit for 10 minutes. Bake 10-15 minutes until golden brown.
Okay, so now for the fun additions. I added a cup of fresh blueberries and a handful of white chocolate chips to the dry mixture before adding the wet ingredients. After brushing the formed scones with egg wash, I sprinkled them with crystallized sugar. Or you could skip the sugar and go the simple glaze route. Instead of blueberries, try raisins or dried cranberries or dried currants. Try adding a little vanilla and cinnamon and then top with a vanilla/milk/powdered sugar glaze. So. Good.
For lunch or dinner, skip the fruit and sugar. Instead, add some chopped scallions, crumbled feta or gouda, fresh chopped herbs (maybe a bit of basil and oregano) and top with shredded cheese. YUM!
Yes, both photos are not of an entire scone. Yes, the recipe did make 12 scones. And yes, this was the very last bite of the very last scone…a mere few hours after breakfast. They were that good. And less than a minute after I finished taking these photos, in walked Rit and gobbled up this last bite. Yep, THAT GOOD.
I’ll be back Monday with a fun sewing project. Hope you’re having a great weekend!
Love, Kate
Monday, January 18, 2010
Getting Started…
So, a lot is going on here. R and I have made some significant decisions regarding how we want our next couple of years to unfold.
We have committed to living on half of R’s salary for one year—HALF! Ouch. Although R doesn’t make a lot of money, she makes a good salary. And we feel that we spend more than we need to each month. Okay, let’s be honest, I spend more than I need to each month. And that other half of her salary? It’s going into savings. We’re going to do some traveling and the rest will go toward building our dream house in a couple of years—a spacious (not large) barn house with lots of windows on some spectacular acreage…with chickens…and a two-car garage.
The budget will be finalized this week. And living within such a strict budget? I know it sounds crazy, but it excites me! I look forward to the challenge. I welcome the creative problem solving. Part of the challenge will be to make this small house continue to work for our growing family for the next two years. Toward that goal, I am making daily decisions, conscious choices that keep us on the right path. More about that later in the week.
For now, I want to tell you about one of my favorite books in the kitchen: The River Cottage Family Cookbook. Love, love, love this book! It’s full of recipes and ideas for living and eating well. this book contains some great information on dairy foods, including directions on how to make butter. I realize that you’ve already tried this, but I haven’t, and I loved it. So easy! Last night, we enjoyed a dinner of homemade vegetable soup, homemade sourdough bread and homemade butter. Yes, butter! We made butter!
Please follow along with my make your own butter tutorial:
Start with heavy cream, locally produced is better, and leave it on the counter about 30 minutes or so, until it’s room temperature. The fresher the cream, the longer it will take to turn into butter.
Find a clean glass jar with a tight-fitting lid. I used an empty applesauce jar. Fill it one-third full with cream. It needs plenty of room to move around and churn, so keep it to one-third full.
Screw the lid on tightly and start shaking! Shake it up and down and all around so that the cream is really moving around and hitting the bottom of the lid. Don’t stop shaking until the butter is finished. It’s a good workout using such a large jar. R and I had to take turns! The boys loved it.
At first, it will obviously feel like cream sloshing around in there. Then, it will get quiet and you won’t be able to see into the jar. Voila! Whipped cream!
Keep shaking! Suddenly, you’ll feel something heavy sloshing around in there, surrounded by liquid. It may take anywhere between 10-30 minutes to get to this point. You’re almost done! At this point, it’s very soft and looks like whipped butter. It needs a little more shaking to firm up a bit more and separate from the buttermilk.
All finished. Here’s what the butter looks like before it’s drained:
Drain the buttermilk into a separate container.
Then fill the jar with cold water, slosh the butter around and drain. Repeat this step until the water runs clear. Dump the butter onto a wood cutting board. Press with the back of a wooden spoon or with your hands to remove the rest of the buttermilk. If the butter is still full of buttermilk, it will spoil more quickly.
All done! Shape, wrap in wax paper and store in the refrigerator.
I highly recommend enjoying your fresh butter with fresh-from-the-oven, still-warm sourdough bread. Does it get any better than this?
Love, Kate


