
Showing posts with label Gardening. Show all posts

Monday, October 17, 2011

My First Canning Adventure!

I know, I know, all I've been writing about lately is food! Well, that's what my life is all about right now. I love living in a bigger house so that we have room for some food storage! FINALLY! As most of you already know, Rit and I bought a new refrigerator a couple of months ago. I LOVE THIS THING! I know it's silly to fall for an appliance, but it seriously makes my life so much easier. I love the extra space, the great lighting, and the filtered water in the door. I drink so much more water now! I hated washing and filling up our old Brita filter in the fridge before. Anyway, we also bought a freezer at the same time.

I have never had a separate stand-alone freezer. It's a whole new world. I. Love. It. I have been spending a lot of time lately roasting tomatoes, making soups with fresh local produce, and making vegetable and chicken stock...all for the freezer. I'm thrilled with the concept of being able to use local-produce-based, homemade foods all winter. Plus, as silly as it may sound, I find it really satisfying to "put up" food and to see what I've accomplished from this fresh, local produce. I know where it came from and how it was made. I love that!

After listening to Amy's stories of preserving, I decided to try to dehydrate some hot peppers and make our own chili powder. The peppers from the farmer's market were gorgeous and cheap (remember them from my last post?) We also harvested quite a few from our small garden. So, while wearing gloves, I sliced them length-wise in half and removed the seeds. I then dehydrated them. When they were nice and dry, I put them in my beloved Vitamix blender and turned them into powder.
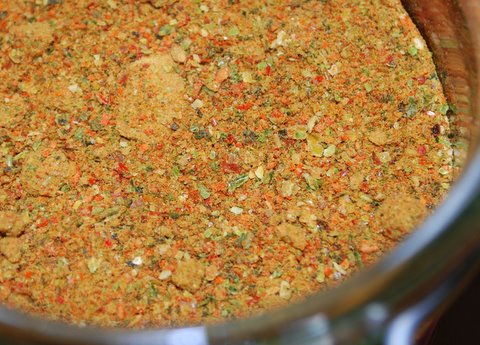
If you try it, just be careful not to inhale when you take the lid off of the blender. It's potent stuff! But it smells heavenly. We can't wait to make chili this winter with our roasted tomatoes and homemade chili powder! Thanks for the idea, Ames!

The boys are in love with dehydrated apples, so I'm making as many as I can. We purchased apples CHEAP from a local orchard. We actually got a really good variety, too.


I bought two dehydrators cheap at a local factory store. They've been running almost non-stop since I bought them a couple of weeks ago. But, in lieu of a dehydrator, an oven can also be used to dehydrate apples. First peel, core and slice your apples. As you slice them, place them in an antibrowning bath. You can make the bath by crushing and dissolving 6 500mg vitamin C tablets in 2 c. of cold water or by adding 1/4 c. lemon juice to 2 c. cold water. After 10 minutes in the bath, remove and pat the apple slices dry. If using the oven method, place the slices on a cake cooling rack and place the rack in a 170 degree oven for about 3-4 hours. If using a dehydrator, place the apple slices on the racks in the dehydrator, careful not to overlap. The time in the dehydrator depends on the type of dehydrator. The slices are done with they are leathery and won't stick together when squeezed together. Cool and then place them in a covered container for one week. If there is no moisture in the container after one week, transfer the slices to an air-tight container and store for up to one year. If moisture is present, try dehydrating longer.


So aside from dehydrating and freezing, I tried my hand at canning this weekend...for the first time! I was a little intimidated, but I read a lot before I got started and I hope I did it right. I have to wait a little longer before checking to see if my jars sealed correctly.


I used a variety of apples. I did core them, but I didn't remove the skins as that is where so many nutrients are found.

I didn't add any sugar at all, just lemon juice and cinnamon. It's delicious! I canned 8 quarts so far and made some to keep in the fridge, which Rit has almost finished off already.

I am loving all of this preserving and I look forward to another week of it. It's getting me even more excited for my big garden next year. YEAH!

Love, Kate

Tuesday, March 16, 2010

Tutorial: Seed starting Part 2

Kate,
I love the bag. I hope you get the iron thing resolved as well, most frustrating! Well, it's time to transplant my seedlings. We transplant to provide more room for the root system and to move them into separate containers so they will be easier to plant in the garden. We usually don't transplant all of the plants, but pick the strongest ones.


As you can see in the photo, they've grown quite a bit. The larger ones are the zucchini, cucumber, cantaloupe and pumpkin. The smaller ones that you see are the cauliflower and tomatoes. I'm still waiting on the peppers. The germination is longer on those and I hope they come up!!
So here's how to do it...

I get some of those empty plastic pony packs or you can use the jiffy pots that you can plant right in the ground. We reuse our pony packs...I'm not sure the experts would recommend it, but it's worked fine for us. Also, keep a pencil handy...you'll need it. If planting indoors, I use newspaper to cover my work space...you can see that in the background :)

After filling the pots you are using with potting soil, make a hole with the pencil in the center of the pot.

Next, carefully use the pencil to help loosen the roots of the seedling and while lifting carefully just under the leaves, pick the plant out of the dirt (you can carefully pick it up by the leaves). MAKE SURE YOU HANDLE IT CAREFULLY...DON'T PINCH OFF THE STEM OF THE PLANT. I never pinch when lifting...that is where the pencil comes in handy.


With the help of the pencil, place the roots in the hole and lower the plant. We do bury ours deep so that they don't get as "leggy" as they grow, and they'll have a better root system.


As you will notice, my tomatoes are buried deep...not much showing above the dirt.
Now we leave them by the window under the fluorescent light. I do think the light is working better this year than just the light from the window. Our plants have grown toward the window in past years, but we haven't noticed that this year.

I am also going to start leeks, acorn squash and basil this week...so excited to try those things. I've never planted leeks before so that will be fun! I'll keep you posted on how the hoop house is coming. I'm hoping to make some great progress this week!
Love,
Amy

Tuesday, March 9, 2010

Tutorial: Starting Seeds for the Garden

Dear Kate,
It's time to start thinking about the garden, so that is what we did last week! We decided to plant our seeds indoors so that they'll be ready to move into the garden in 6-8 weeks or possibly the hoop house sooner than that. This is how we did it.

I started with a flat planting tray, potting soil, seeds, a pencil, and Popsicle sticks to mark my rows and label the seeds. Some of the planting trays have holes, so if you get one that does, make sure something is put under it to catch any water.


After filling the tray with potting soil, we pushed a pencil down to leave an impression in the dirt to plant our seeds in.

We placed the seeds in the impression spacing only about 1/2" apart. We will later move the small plants to containers so they will have more space for growing. We will only transplant the best plants at that time, so I am not to particular about numbers and spacing at this point.


After covering the seeds with soil, we write on the Popsicle stick what we planted and then place at the beginning of where those seeds are. I usually break the stick in half to make them more manageable. Then we sprinkle them carefully with water...a spray bottle works great. Be careful not to wash away your seeds!

We put them in front of the window that gets the most sun. South facing would be ideal, but we don't have one, so we use our west window. We also added a fluorescent light this year to see how that works. It is on during our waking hours. We also covered them with a plastic cover that came with the tray. It helps to keep them moist, I haven't watered them since planting.


This is how they look after five days! Some are looking good and others haven't sprouted, but should soon. I planted squash, zucchini, cantaloupe, cucumbers, cauliflower, pumpkins, peppers (several types), tomatoes (several types), gourds and sunflowers. I'll post again when we're ready to transplant.
Happy Gardening!
Amy